
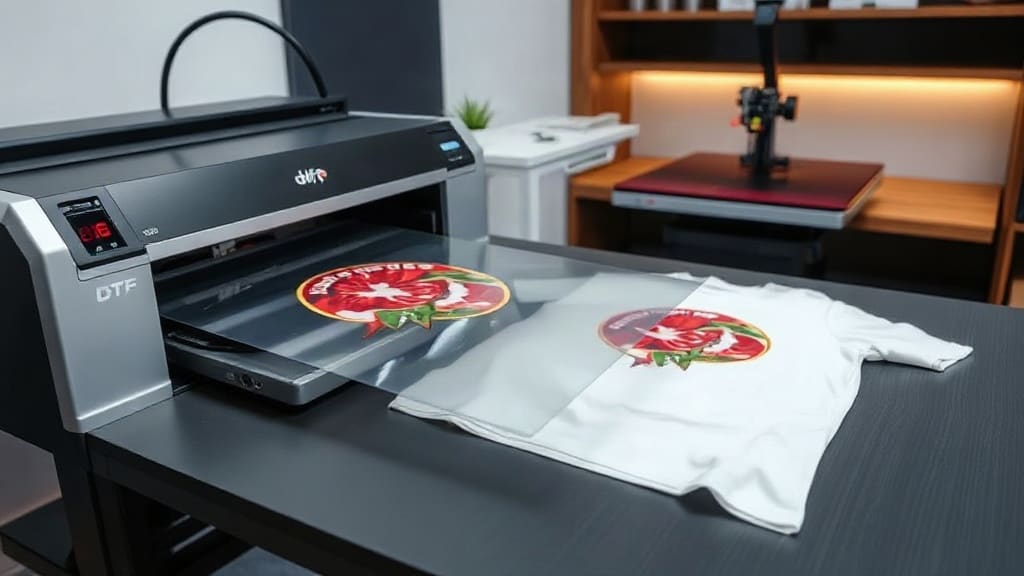
DTF transfers have revolutionized the custom apparel industry. If you're looking for a versatile, cost-effective way to create vibrant designs on various fabrics, you've likely heard of this technology. Whether you're a small business owner, a hobbyist, or just curious about the latest printing methods, this guide will walk you through everything you need to know about DTF transfers, from the printing process to application tips and common mistakes to avoid.
In recent years, DTF (Direct to Film) has emerged as a popular alternative to traditional screen printing and heat transfer vinyl. Unlike other methods, DTF allows you to print full-color designs with high detail onto a special film, then transfer them onto fabric using a heat press. The result is a soft, durable print that can be applied to cotton, polyester, blends, and even some non-fabric surfaces.
If you're considering DTF for your business or personal projects, you're in the right place. This article will cover the ins and outs of DTF transfers, including the equipment needed, step-by-step application, cost considerations, and tips for achieving professional results.
What Are DTF Transfers?
DTF transfers are created using a process called Direct to Film printing. Here's how it works:
- Printing: A DTF printer prints your design in reverse onto a special PET film using CMYK plus white ink. The white ink acts as a base for the colors, ensuring they pop on dark fabrics.
- Powdering: After printing, a hot-melt adhesive powder is applied to the wet ink. This powder is what makes the transfer stick to the fabric when heat is applied.
- Curing: The film with powder is then heated (often in a tunnel dryer or with a heat press) to melt the powder and cure the ink. This creates a durable, flexible film.
- Transfer: To apply, you place the film onto the fabric with the design side down, apply heat and pressure with a heat press, peel off the film, and you're done.
One of the biggest advantages is that you can print multiple designs efficiently, making DTF ideal for both small custom orders and bulk production. Unlike screen printing, there are no screens to set up, so the cost per unit remains low even for one-off designs.
Why Choose DTF Transfers?
There's a reason why DTF transfers are gaining popularity among custom apparel makers. Let's look at some key benefits:
- Versatility: DTF works on a wide range of fabrics, including cotton, polyester, nylon, and blends. It's also suitable for items like tote bags, hats, and even leather.
- Soft Hand Feel: Unlike thick vinyl prints, DTF prints have a soft texture that doesn't crack or peel easily.
- Durability: When applied correctly, DTF transfers can withstand many washes without fading or cracking.
- Detail and Color: The printing process allows for intricate details and vibrant colors, including gradients and small text.
- Cost-Effective: No minimum order quantities; you can print just one shirt at a time if you want.
Another advantage is the ability to pre-print designs and store them for later use. This means you can print a batch of transfers, then apply them as orders come in, saving time and space.
Equipment and Materials Needed for DTF Transfers
To start making DTF transfers, you'll need certain equipment. Here's a basic list:
- DTF Printer: This is typically an Epson or similar inkjet printer that has been modified to print with pigment inks and white ink. You can buy a specialized DTF printer or convert a standard printer.
- DTF Inks: You'll need CMYK inks plus white ink. These are specially formulated for DTF printing.
- PET Film: The transfer film must be compatible with DTF printing. It comes in various widths.
- Hot Melt Adhesive Powder: This powder is essential for the transfer to adhere to fabric.
- Heat Press: A clamshell or swing-away heat press is necessary for curing and applying the transfers.
- Curing Oven or Heat Press for Powder: Some people use a separate heat source to melt the powder, but a regular heat press can work if you're careful.
- Protective Film (Optional): Some DTF films have a clear protective layer that you peel off after printing.
If you're new to DTF, you might consider purchasing a starter kit that includes most of these items. However, it's important to research and choose reliable equipment, as quality varies.
Step-by-Step: How to Create DTF Transfers
Creating your own DTF transfers involves several steps. Here's a detailed guide:
Step 1: Design Your Artwork
Using graphic design software like Adobe Illustrator or even free options like Canva, create your design. Keep in mind that the final print will be mirrored, so you'll need to flip the image horizontally before printing. Also, ensure that any text is in the right orientation.
Step 2: Print the Design onto Film
Load the PET film into your DTF printer. Make sure the printer settings are correct: use the appropriate profile, print with white ink under the colors, and set the correct resolution (usually 720 dpi or higher). Print the design in reverse (mirrored).
Step 3: Apply Adhesive Powder
Immediately after printing, while the ink is still wet, apply a generous amount of hot melt adhesive powder over the design. Shake off the excess powder. The powder only sticks to the ink, so the areas without ink will be clean.
Step 4: Cure the Powder
You can cure the powder using a dedicated curing oven or a heat press. If using a heat press, set the temperature to around 160°C (320°F) and press for about 20-30 seconds. Ensure even heating. After curing, the powder should be melted and fused with the ink.
Step 5: Apply the Transfer to Fabric
Preheat your garment for a few seconds to remove moisture. Place the transfer on the garment with the design side facing down (the film side should be on top). Use a heat press set to 160-170°C (320-340°F) with medium to heavy pressure, and press for 10-15 seconds. Let it cool for a few seconds, then peel off the film slowly, preferably at a sharp angle.
That's it! Your garment is ready. For best results, wash inside out and avoid using fabric softeners.
DTF Transfers vs. Other Methods
To truly understand the value of DTF, it's helpful to compare it with other common methods like screen printing, vinyl, and DTG (Direct to Garment).
DTF vs. Screen Printing
Screen printing is great for large orders because the setup cost is spread out, but for small runs, it becomes expensive. DTF has no setup cost, so it's perfect for low quantities. Also, DTF allows for more colors and gradients without additional screens.
DTF vs. Heat Transfer Vinyl (HTV)
HTV is simple for single-color designs and small projects, but it's not suitable for full-color or detailed designs. DTF can produce complex, multi-colored graphics with ease.
DTF vs. Direct to Garment (DTG)
DTG prints directly onto the shirt, which is great for one-off designs, but it requires a pretreated fabric and often works best on 100% cotton. DTF is more versatile with fabric types and can be pre-printed and stored.
Each method has its place, but DTF transfers offer a unique blend of flexibility, quality, and cost-effectiveness that appeals to many businesses.
Common Mistakes and How to Avoid Them
Even seasoned printers can make mistakes when working with DTF. Here are some pitfalls to watch out for:
- Incorrect Mirroring: As mentioned, you must print mirrored. Forgetting this will result in reversed text.
- Too Much or Too Little Powder: If you use too little powder, the transfer may not stick well. If you use too much, you'll get a sticky residue. Aim for an even coat.
- Wrong Temperature or Time: Too low temperature or short pressing time can lead to poor adhesion. Too high could damage the film. Follow the recommended settings for your materials.
- Using Low-Quality Film: The film quality directly affects the transfer quality. Invest in good PET film.
- Not Preheating the Garment: Preheating removes moisture and wrinkles, ensuring a better bond.
- Peeling Too Soon: Always wait for the transfer to cool before peeling. Peeling hot can cause the adhesive to stretch and distort.
By avoiding these common errors, you'll get more consistent and professional results.
Tips for Successful DTF Transfers
Here are some extra tips to help you get the most out of your DTF transfers:
- Test First: Always do a test print and application on a scrap piece of fabric before doing your final product.
- Use Quality Inks: High-quality inks will give you better color vibrancy and durability. Don't skimp on this.
- Maintain Your Printer: Regularly clean your print heads to prevent clogs, especially with white ink which is thicker and can settle.
- Store Transfers Properly: If you pre-print transfers, store them in a cool, dry place away from sunlight.
- Consider a Cutting Machine: If you want to cut out individual transfers for small items, a vinyl cutter can help you cut around the design.
With practice, you'll find the process becomes second nature.
Cost Considerations
The initial investment in DTF equipment can be significant, but many find it pays off. Here's a rough breakdown:
- Printer: A dedicated DTF printer can cost anywhere from $2,000 to $10,000 depending on brand and features. Alternatively, you can convert an existing printer for around $500-$1,000.
- Heat Press: A good commercial heat press is around $500-$1,500.
- Consumables: Film, ink, and powder cost per transfer. On average, per transfer cost might be $0.50-$2.00 depending on size and quantity.
If you're just starting out, you might consider using a DTF transfer service that prints and sends you the transfers, which you then apply yourself. This eliminates the need for printers and inks, reducing startup costs.
As your volume increases, the cost per transfer decreases, making DTF even more attractive.
Frequently Asked Questions About DTF Transfers
Can DTF transfers be used on dark colored garments?
Yes, absolutely. The white ink layer in DTF printing ensures that the design stands out even on dark fabrics. That's one of the main advantages over other methods.
How many washes can DTF transfers withstand?
With proper application and care, DTF transfers can last for many washes, often 50 or more, without significant fading or cracking. To maximize longevity, wash garments inside out in cold water and avoid tumble drying on high heat.
What is the difference between DTF and sublimation?
Sublimation works only on polyester or polymer-coated surfaces, and the design becomes part of the fabric. DTF works on a variety of fabrics, including cotton, and produces a print that sits on the surface with an adhesive layer. DTF offers more versatility in terms of fabric.
Can I use DTF transfers on non-fabric items?
Yes, DTF transfers can be applied to many hard surfaces like mugs, wood, or leather, as long as the surface can withstand the heat and pressure. However, the adhesion may not be as durable as on fabric, so it's best to test first.
How do I store pre-made DTF transfers?
Keep them in a cool, dry place away from direct sunlight. It's also a good idea to store them flat or rolled in a way that doesn't crease the film. With proper storage, they can last for months.
Conclusion
DTF transfers are a fantastic option for anyone looking to create custom apparel, whether for a business or personal projects. They offer excellent print quality, versatility across fabrics, and cost-effectiveness for small runs. By understanding the process, investing in the right equipment, and practicing your technique, you can produce professional-looking transfers that your customers will love.
If you're ready to dive in, consider starting with pre-made transfers from a reputable supplier to test the waters. As you gain experience, you can gradually invest in your own printing setup. The world of DTF is exciting and full of potential, and I hope this guide has given you the information you need to get started.